
After much thought over the last couple of months, I finally decided to pull the trigger on an indoor bike trainer, and I have no regrets whatsoever. It took until Mid-January for us to really get winter weather in Western NY this year, and now that it’s finally hit, I’ve been struggling with the motivation to get out and run when it’s single digits and I can’t find any pavement to run on – that’s mostly thanks to the week long, on again, off again lake effect storms we’ve been enduring. It took me quite a while to decide on what I wanted, but even in that deliberation I only ever had two brands that I was considering, Wahoo and Garmin. Wahoo really has some great devices in the fitness field, especially within the cycling realm, and they have a long support lifecycle, which is what ultimately led me to them.
I was split between the Kickr Core and the Kickr Snap – and what drew me to the Snap was that the rear wheel is left on, allowing it to be used like a rolling trainer, but also provided resistance like some of the others that use the cassette resistance, such as the Core, or the Garmin Tacx Trainers. In addition, with using the Wahoo brand I wasn’t stuck within an Ecosystem – Wahoo is pretty open with what other devices can be used with it, for example my Forerunner 955 Solar watch fully recognizes the Wahoo trainer. When used with Zwift, which I’ll get into later, I can pair the Heart Rate Sensor within my Watch, and also use the power and resistance sensors on the trainer, so I’m using the hodgepodge of devices that I want to be using with my specific training program.
The simplicity of setting up the snap was fantastic, I opened up the box and there were two other small boxes in there, one was a power supply with four different powers adapters – a 120v for our standard US outlets, and three different 240v options. While I am presently hooked up to the standard 110v plug, after settling this trainer into a more permanent spot in my basement, the 240v option could be a good way to go as I have some space by my dryer. The other was a replacement axel kit for bikes that do not have quick releases on their rear tires – the Snap utilizes the elongated lever from the quick release to be able to have some extra grip on one side of the tire, while the other side sets in on the standard connector.
While my Giant Contend 3 does have a quick release on one side of the rear tire, I decided to use the axel kit that came with the trainer just to go through the full process and use all of the parts that came with the trainer. It was very easy to feed it through and only needs to be hand cranked for use with the trainer – although if you want to make sure there’s some extra security with it, feel free to use an allen wrench to crank down the other side.
Once I got it all setup, it was a matter of clamping that rear tire in, adjusting the resistance gyro to the correct spot on the tire, and pairing the trainer with my desired program! I started off by pairing it with my watch, as stated above I use a Garmin Forerunner 955. This was a matter of holding the middle button on the left side, scrolling down to settings, sensors & accessories, and clicking add new, and doing a calibration spin down – this is where you get the wheel/gyro sensor up to a certain RPM, and let it spin down to a stop. This process took, with the calibration, about 3 minutes. The Forerunner watch series supports the ANT+ protocol as most fitness device sensors do, this is great because it’s far less cluttered of a protocol than Bluetooth is, and allows for pairing of far more devices. After I did this, I grabbed my iPad, launched Zwift, and did the same thing.
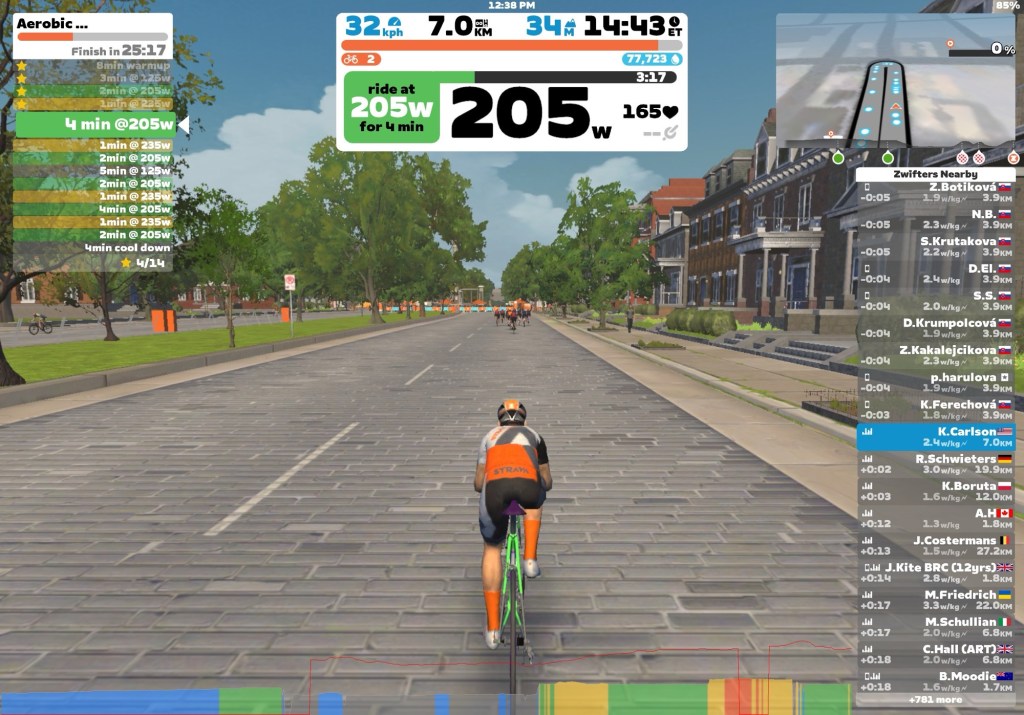
Zwift… I honestly don’t have too much to say about it from a design perspective, it’s like you took the Peloton idea of training with other people, and crossed it with your standard gym exercise bike program, but the cool part is that you get to use your actual bike when riding in the program. The pairing process of the trainer to it was equally as quick – when using this with your tablet or phone it’s going to pair via Bluetooth, so you may be limited by the device that you’re using for how many different sensors you’re using. From what I can gather though, if you’re staying within the Wahoo ecosystem for your other sensors, they’re actually pairing to the trainer and all syncing via one connection to the device you’re running Zwift on. The beauty of this application, at least from my standpoint, is that you can use whatever hodgepodge of sensors and devices you want. If I wanted to use a Polar HRM, a Garmin Trainer, Wahoo Sensors, and sync it all to Whoop, it’ll do it. For example, I was able to broadcast by heart rate from my watch and use that as my HR sensor on Zwift with my Wahoo trainer as the power and resistance sensors, and I was good to go! The cool part was, after I finished my ride, I set it up to automatically upload to Strava and Garmin Connect, so even though I wasn’t recording it through a Garmin activity, it still corrected for my cycling VO2 MAX, and also added in the proper training load – this was apparently something that took a little while for Garmin to support, but now that they do, I’m an even bigger supporter of their products, because this program has some fantastic training opportunities, and I look forward to continuing my winter training on this device using this program.
